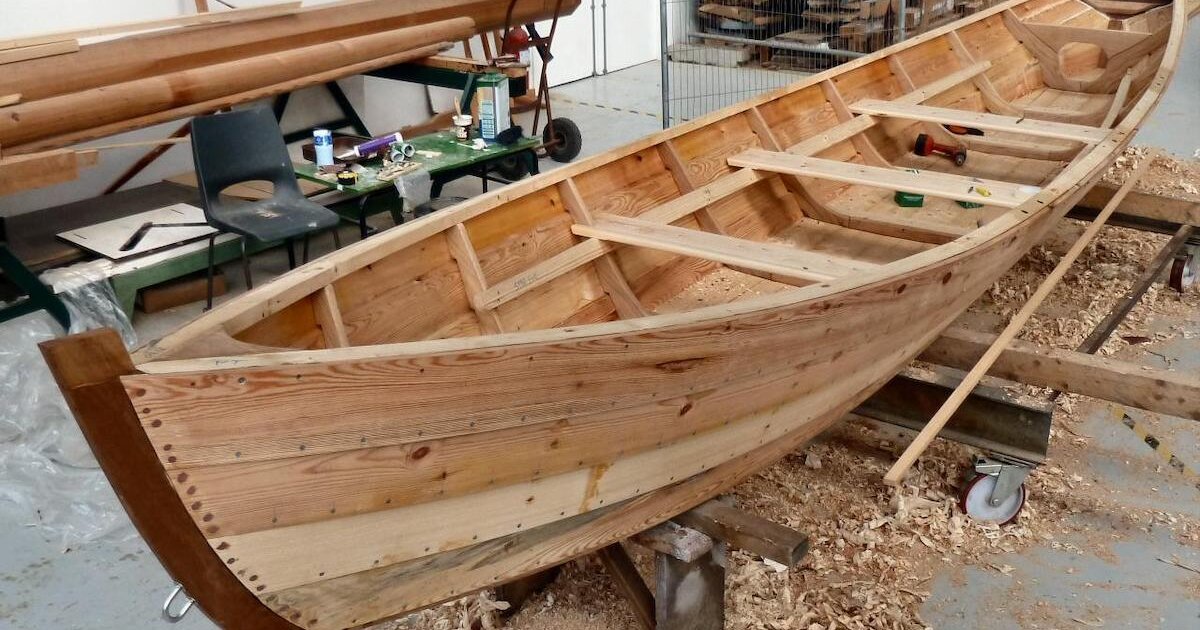
Building a Wooden Fishing Boat: A Comprehensive Guide
The allure of a handcrafted wooden fishing boat is undeniable. Its timeless beauty, durability, and connection to maritime traditions make it a dream project for many. Whether you're a seasoned boatbuilder or a curious novice, this comprehensive guide will equip you with the knowledge and steps to construct your own wooden fishing vessel.
1. Planning and Design
1.1. Determine Your Needs and Purpose
Before embarking on your boatbuilding journey, clearly define your needs and intended use. Consider:
- Size and Capacity: How many people will the boat accommodate? What is the maximum weight it needs to carry?
- Fishing Style: What type of fishing will you be doing? (e.g., inshore, offshore, fly fishing)
- Water Conditions: Will the boat operate in calm waters or rough seas?
- Budget and Time: Set realistic expectations for your budget and the time you are willing to dedicate.
1.2. Choose a Design
A vast array of boat designs exist, each with its own advantages and disadvantages. Research and select a plan that aligns with your needs and skill level. Consider:
- Hull Shape: Displacement hull (slow and stable) vs. planing hull (faster but less stable)
- Length and Beam: Balance stability, speed, and maneuverability.
- Construction Method: Carvel (smooth, planked hull) vs. lapstrake (overlapping planks)
- Rigging: Sailboat vs. motorboat.
Popular boat designs for fishing include:
- Dory: A shallow-draft, flat-bottomed boat perfect for inshore fishing.
- Skiff: A versatile boat with a wide beam, suitable for both fishing and general boating.
- Punt: A flat-bottomed, square-shaped boat ideal for shallow waters.
1.3. Gather Materials and Tools
The materials you'll need will vary depending on the chosen design and your skill level. Commonly used materials include:
- Wood: Marine plywood, cedar, mahogany, oak, or other suitable hardwoods.
- Epoxy Resin and Hardener: For bonding wood and creating a waterproof seal.
- Fiberglass Cloth and Resin: For reinforcing the hull and adding strength.
- Hardware: Fasteners, hinges, cleats, etc.
Essential tools include:
- Hand Planes and Chisels: For shaping and smoothing wood.
- Saws: Circular saw, jigsaw, handsaw.
- Drills and Drill Bits: For creating holes and securing fasteners.
- Clamps: For holding pieces together during assembly.
- Sanding Equipment: Sandpaper, belt sander, orbital sander.
2. Building the Hull
2.1. Constructing the Frames and Ribs
The frame is the skeleton of the boat, providing its shape and strength. Follow the design plans to create the frames, typically using wood or metal.
The ribs, also known as timbers, are attached to the frames to form the curved shape of the hull. Use the design plans to accurately cut and shape the ribs.
2.2. Planking the Hull
Planking involves attaching planks of wood to the frames and ribs. The method can vary depending on the design.
- Carvel Planking: Planks are laid edge-to-edge, creating a smooth hull.
- Lapstrake Planking: Planks overlap, forming a more traditional look.
Ensure each plank is carefully fitted and secured with fasteners or epoxy. Consider using a steam bending technique to create curved planks for the hull.
2.3. Filling and Fairing the Hull
Once planked, the hull needs to be filled and faired to create a smooth and watertight surface. Use epoxy filler to fill any gaps or imperfections. Then, use fairing compound to smooth out the surface for a uniform finish.3. Adding Deck, Superstructure, and Fittings
3.1. Building the Deck
The deck provides a platform for walking, storage, and additional features. Construct the deck frame according to the design plans, using wood or metal. Cover the frame with planks and secure them with fasteners.
3.2. Adding Superstructure
Superstructure refers to any structures built on top of the deck, such as a cabin, cockpit, or console. Follow the design plans to construct the superstructure using wood, fiberglass, or other materials.
3.3. Installing Fittings
Install necessary fittings like cleats, hardware, rails, and hatches. These fittings provide functionality and safety for the boat.
4. Finishing and Launching
4.1. Applying Finish
After installation, sand the entire boat to create a smooth surface. Apply a primer to seal the wood and enhance paint adhesion. Then, apply multiple coats of marine paint to protect the boat from water, UV rays, and environmental damage.
4.2. Launching the Boat
Before launching, thoroughly inspect the boat for any leaks or imperfections. Conduct a sea trial to ensure the boat handles well and meets your expectations.
5. Maintaining Your Wooden Boat
Wooden boats require regular maintenance to ensure longevity and performance. Here are some key aspects of maintaining your wooden fishing boat:
- Cleaning and Washing: Wash the boat regularly to remove dirt, salt, and other debris.
- Inspecting for Leaks: Regularly check for any signs of leaks and address them promptly.
- Protecting the Wood: Apply a layer of varnish or sealant to protect the wood from water and UV damage.
- Checking Fittings: Ensure all fittings are securely fastened and functioning properly.
Building a wooden fishing boat is a rewarding experience that combines craftsmanship and passion for the sea. By following these steps, you can create a beautiful and functional vessel that will bring joy for years to come.
Remember, this guide provides a general overview. It is crucial to refer to specific design plans and consult with experienced boatbuilders for personalized guidance and expertise.


No comments:
Post a Comment
Note: Only a member of this blog may post a comment.